
Collage on a Theme
Collage theme - Mokau
We have a batch at Mokau and I love to wander round the bush and seashore taking photos and just soaking up inspiration. this small collage is a mixture of prints, paper, fabric and stamps laminated with gel medium top and bottom onto a felt base and quilted in a pebble stitch to make the whole cohesive.
The only image that is definitely Mokau is the bridge at the bottom left - it is from a pamphlet that advertised the small community. All the other images are found bits and pieces that evoke that feeling of being at the seashore. If you look carefully you will see where I have stamped the word Mokau in the middle with small paua embellishments on either side. There are some beads in a grid just above this. The godwit was added as an impact image but I have never seen these birds at the shore. It doesn’t really matter if the focus is on the art collage and not specifically documentary correct
The whole idea is to create something unique in a creative way without it having to cost very much money

Spirit Doll
Google describes spirit dolls as: Spirit dolls carry special meaning and significance. They are a personal talisman that can be used on your life's journey to guide, inspire and heal.
Spirit dolls have a long standing history and have enjoyed a resurgence of interest over the past few years. Many of the dolls are made to represent special occasions or times of the year. The spirit doll featured above is from my project on Parallels of Maori and Celtic customs and art. This doll is an oak tree spirit representing the oak king who ascends the throne at the winter solstice (Matariki) and controls the lengthening days and move to planting and harvesting. With the approach to the Winter solstice only a month away this seemed a pertinent blog to include..
This doll has a head made from air dry clay. I moulded it around an egg to get the shape it I did have to break the egg to get out the contents out at the end so the back of the head is filled with stuffing. The Oak leaf at the top of the head symbolises the oak king ascendance. The bottom leaves are magnolia leaves. They have a crocheted border and chain stitch down the central vein. Over these I have placed some leaf skeletons and a cloak of rooster feathers. Under the stuffing in the head I have placed mixed dried healing herbs. These can’t be seen but they are there although I am not sure how long the perfume of them will last.
To enhance its Celtic origins it wears a Celtic symbol neck piece. The hair is animal fibre that has been dyed to match the colour palette I was working with.

Enhancing Colour When Stitching on Leaves
This photo is a forest tulip leaf which was a lovely red colour in the Autumn but I have further enhanced the colour by using a burgundy organza in the sandwich I have stitched over
As you can see, this is from the same series as some earlier photos. It has been moounted on black felt with a pine needle outline

Focus On Negative Space
Gingko Leaves with crossed stems
We have a large gingko tree in our garden - the gingko is said to be one of the oldest trees in existence. At this time of the year its leaves become a glorious golden glow and, as they fall, the leaves carpet the ground below in golden opulence.
I am always looking at what sort of things I might be able to do with all that beauty. I was quite adventurous here. The leaves are painted with gel medium to preserve them. They are positioned on the black felt and then the golden tips are needle felted with green wool rovings. This helped to create a band of more solid media that I could blanket stitch into.
The crosses stems are couched in place and where they cross is needle woven to support the cross.
In the negative space I have couched golden embroidery floss in a diagonal grid with cross stitches at the intersects.
This piece is much more fragile than some of the other stitching on leaves.

Gingko leaves cover the front lawn in Autumn
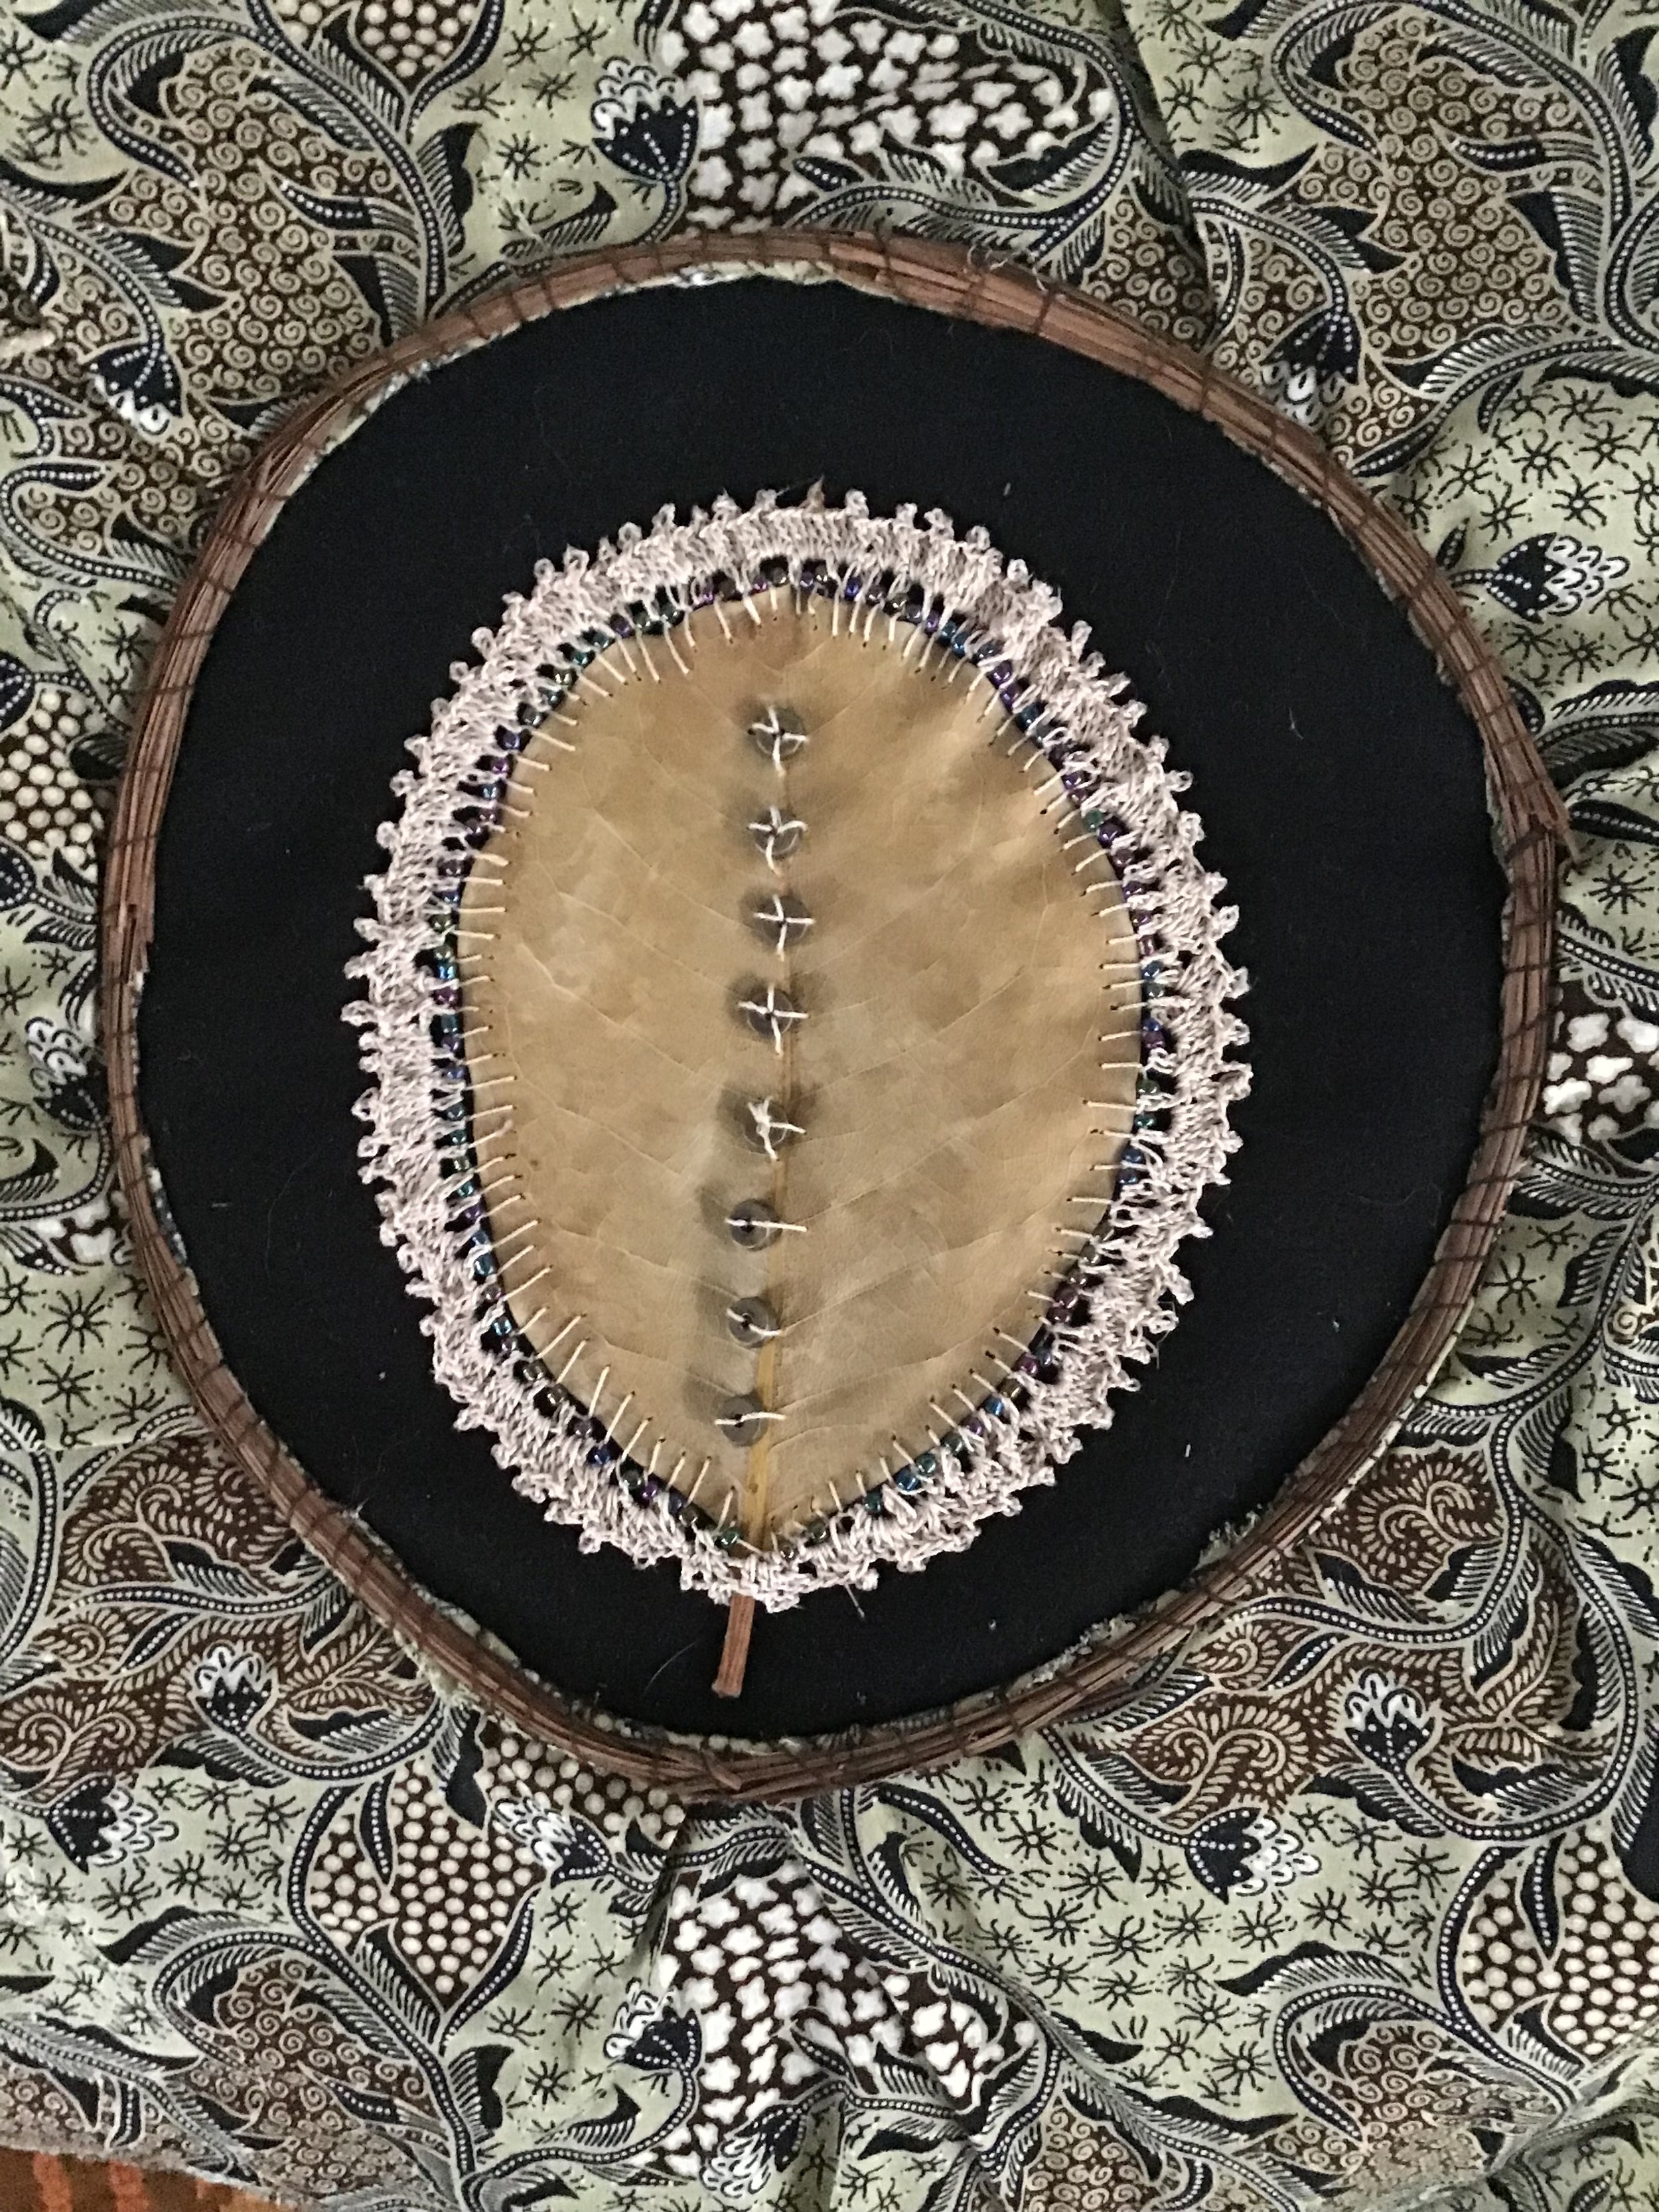
Fine Crochet Edge and Bead Embellishment
Like the earlier leaf with the thicker crotchet edge, this leaf has had blanket stitch applied around the edge and then double crotch and a picot finish in fine crotchet cotton. Small beads have been stitched through the spine and the whole mounted on black felt which has then been placed as a porthole. to finish the edge around the porthole I have used pine needles woven onto the edge with a waxed thread.
The leaf is a magnolia grandiflora leaf and the background fabric is ethnic inspired cotton

Working in a Series
![IMG_E6829[1].JPG](https://images.squarespace-cdn.com/content/v1/639f6bda61e0456d11776132/1684701619943-UG8B3KF9GUTCDVBDULI2/IMG_E6829%5B1%5D.JPG)
You might recognise these beans as those sometimes grown as stock feed. There is a tree in Matakiora Park which is loaded with these in the Autumn. They are quite a bright red and I couldn’t resist bringing some home to see what I could do with them. I just gathered them off the ground
This series started with a sketch in a sketchbook but I was unable to determine which sketch book that was in I have many). At the time I was working on the use of sheers and how using different coloured sheers produces changes in colour and depth. The example on the right replicates this
So then, would the actual pods take some sort of treatment that would create an interesting piece of replicated art. The sample on the left has the been encased in grey organza with red stitching. The whole is mounted on black felt and as the red of the beans didn’t show through as well I have used giant chevron stitch across the beans to reintroduce the colour and further secure the pods. Work like this lasts really well -indefinitely.
Art doesn’t require lots of expensive materials if you look around at what might be in your neighbourhood.
Old Leaf, New Leaf
But Can you tell which is which?
In 2019 I did Jane Dunnewold’s Creative Strength Training. This ten month long course works with archetypes and artist blocks as well as process. It was this course that encouraged me to begin a daily blog so that I would keep regular art time. Unfortunately last year the web host sold out to another company that did not support the blog process I was following and it took me several months to find, learn and pick up from my blog posts. At that time between 3000 and 7000 people a week were visiting my blog. I have a long way to go to get back to that sort of exposure but I have a lot more control over what I can create on this website.
Archetypes as described by Caroline Myss are inner voices that we acquire as we go through life and can effect everything we do. Each archetypes has a positive and negative side but most of us relate more to the negative sides. You know that inner voice (the committee) that keeps telling you that your art will never be good enough? This piece was made during that time.
I particularly connected with the negative part of the Saboteur in my life. I realised that when I didn’t complete a project it was often through fear of criticism. If it isn’t finished you can’t criticise it. During that year I completed what I call the 30 year quilt - a hand quilted NZ Baltimore that, according to the embroidered date in one square, I began 30 years previously - but more about that another day.
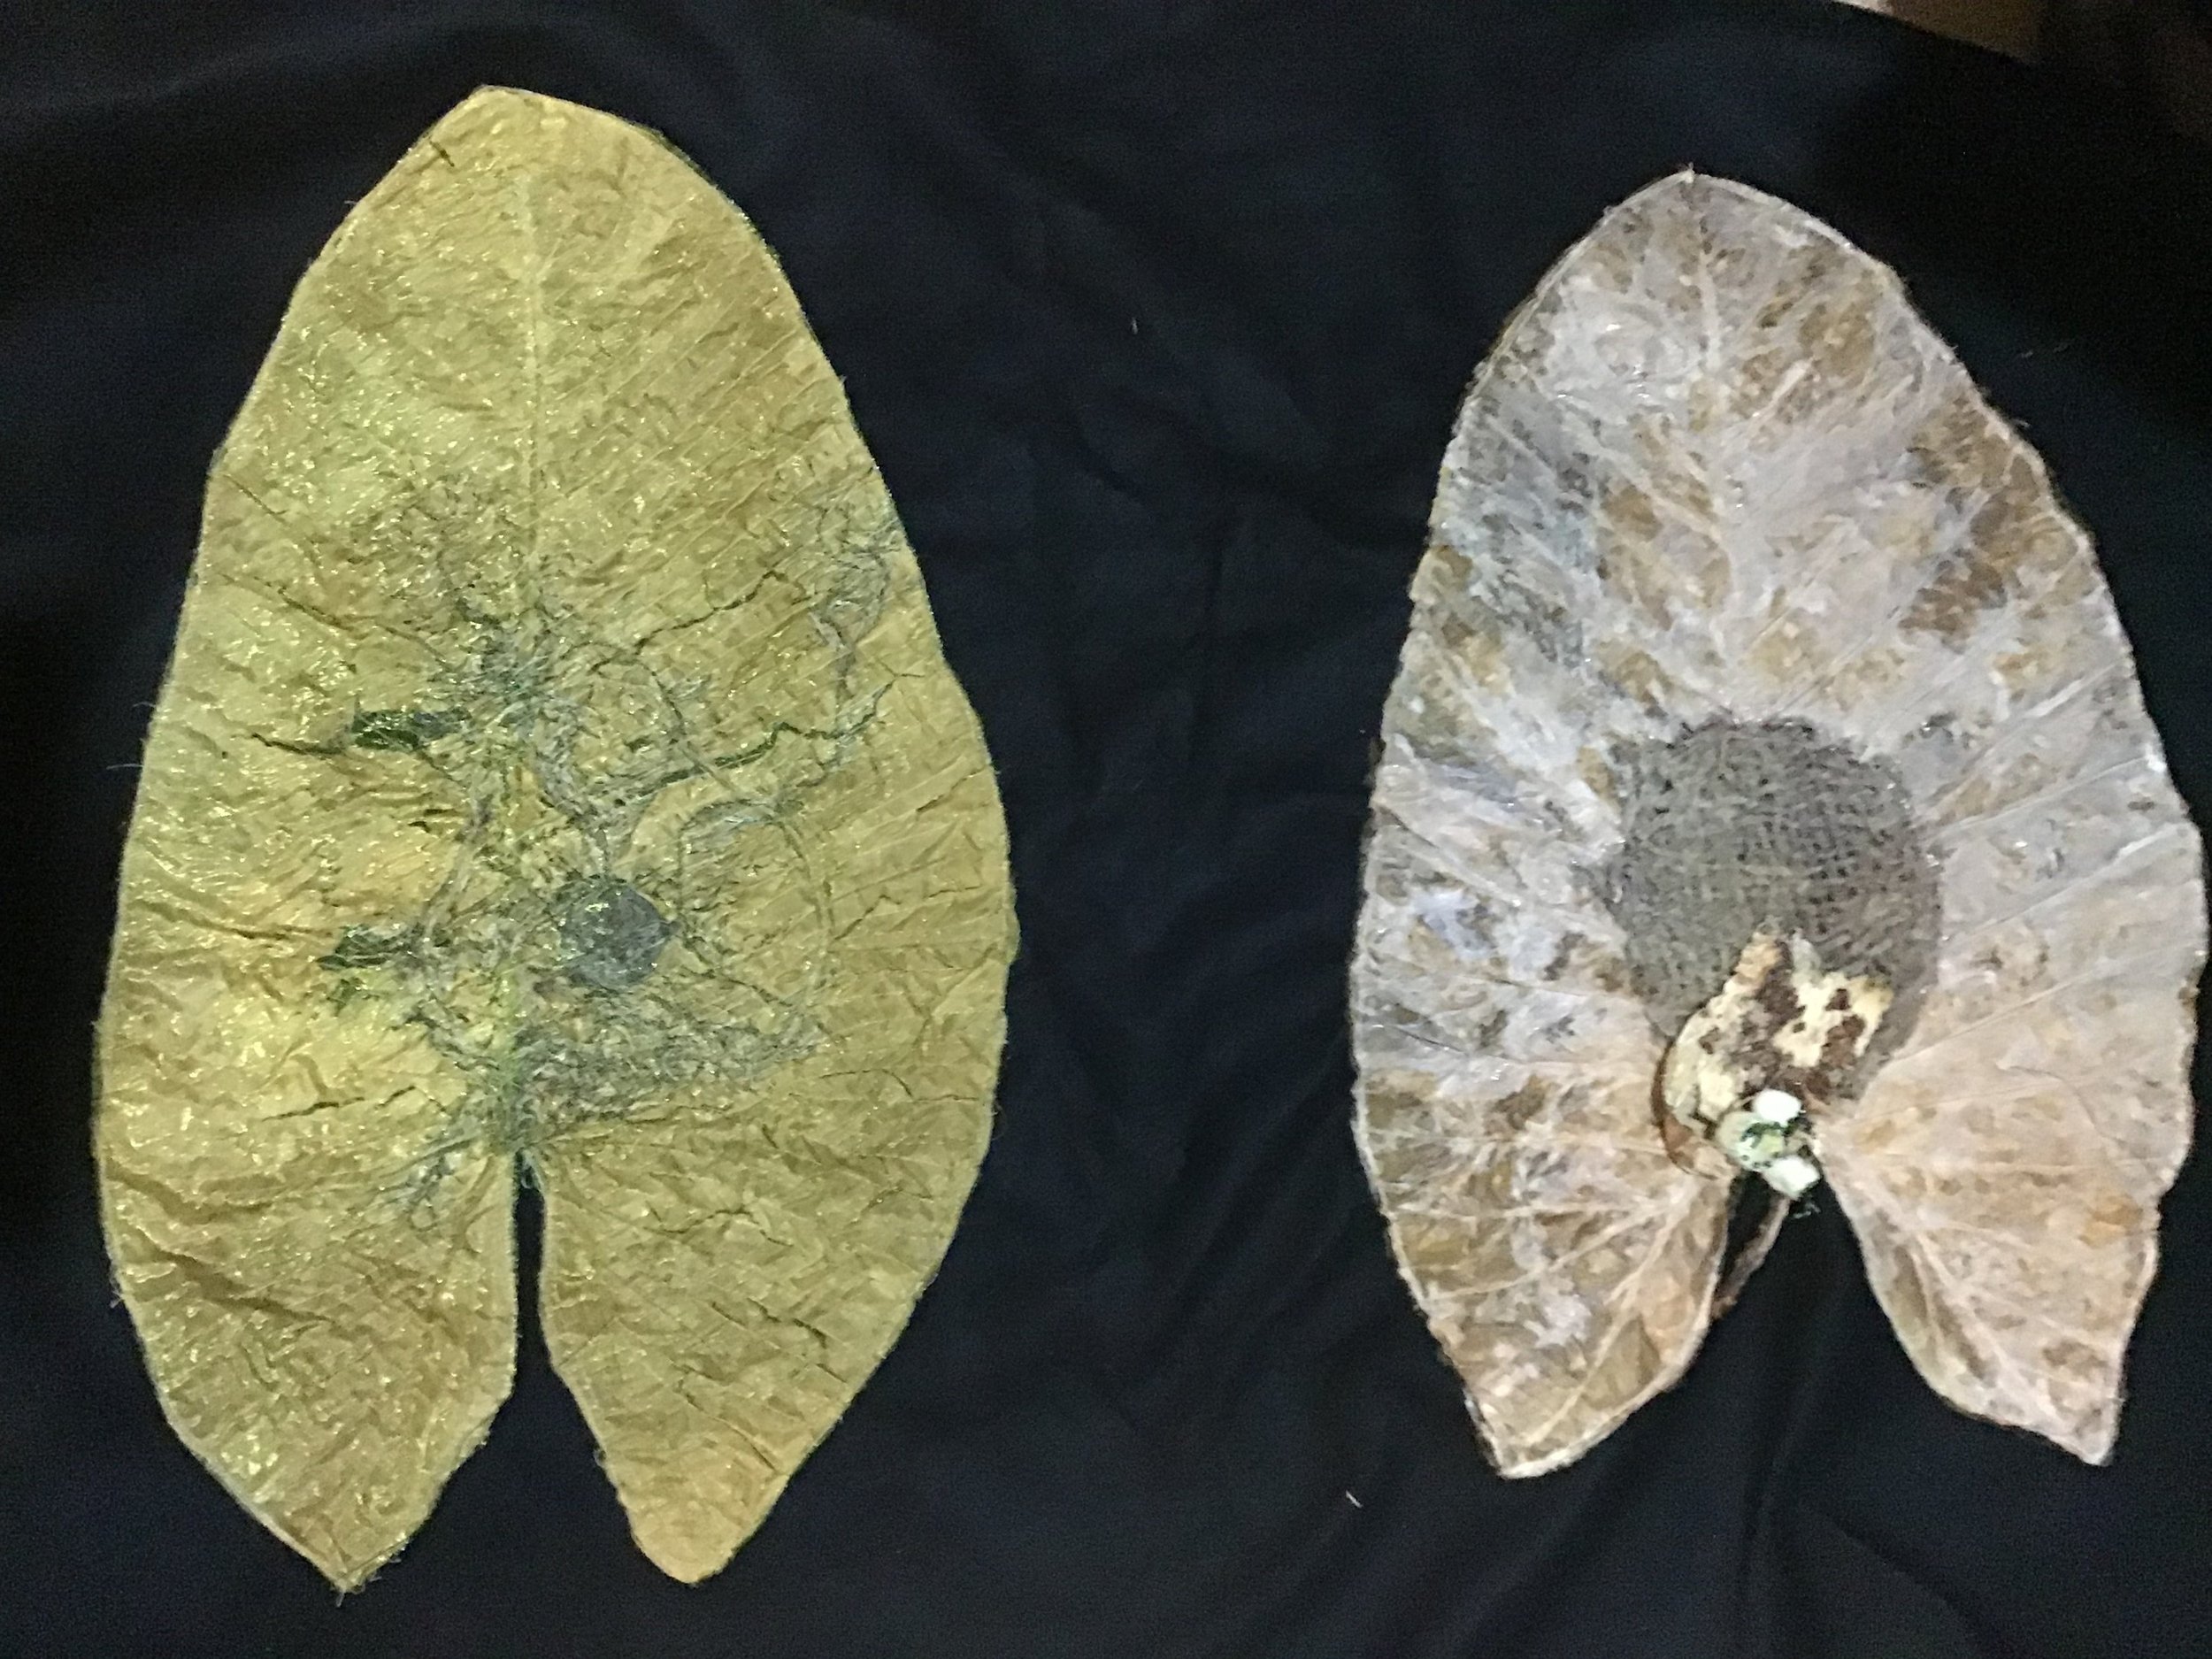
Taro leaves are very large, quite fleshy leaves that have a large starchy root, much enjoyed by Pasifika people as a vegetable. I wanted to try and stitch on something larger in the leaf collection so I started off with a taro. I pressed the first leaf and when I took it out from under the rug where it had been drying, the leaf was quite thin and fragile. I decided to sandwich it between layers of gold organza and trap some bits and pieces inside. These pieces were representative of emotions and ideas that were trapped inside me. I began to stitch. As I stitched some of the leaf began to tear. The Saboteur inside my head said you are wasting your time Carol. I just kept stitching. The Saboteur said it will never amount to anything Carol. I just kept stitching and so it went until the leaf was finished. I felt the tears were like parts of me damaged inside the organza and added to the emotional impact of the leaf.
Then I decided to do a second leaf and experiment with using gel medium to seal the leaf - rather than organza. This time I wove a section in the middle. A piece of silver birch bark fell from one of our trees and I felt it was an omen so I included that also. The leaf looked young and vibrant in its glossy coat so I made some flower buds from silk cocoons to add as embellishment. This was my young leaf.
I mounted the leaves on black felt and put them away for a time. Imagine my surprise when I unrolled the package to find the young leaf had aged and now looked older than the young leaf. I am sure there is a lesson in life in there.
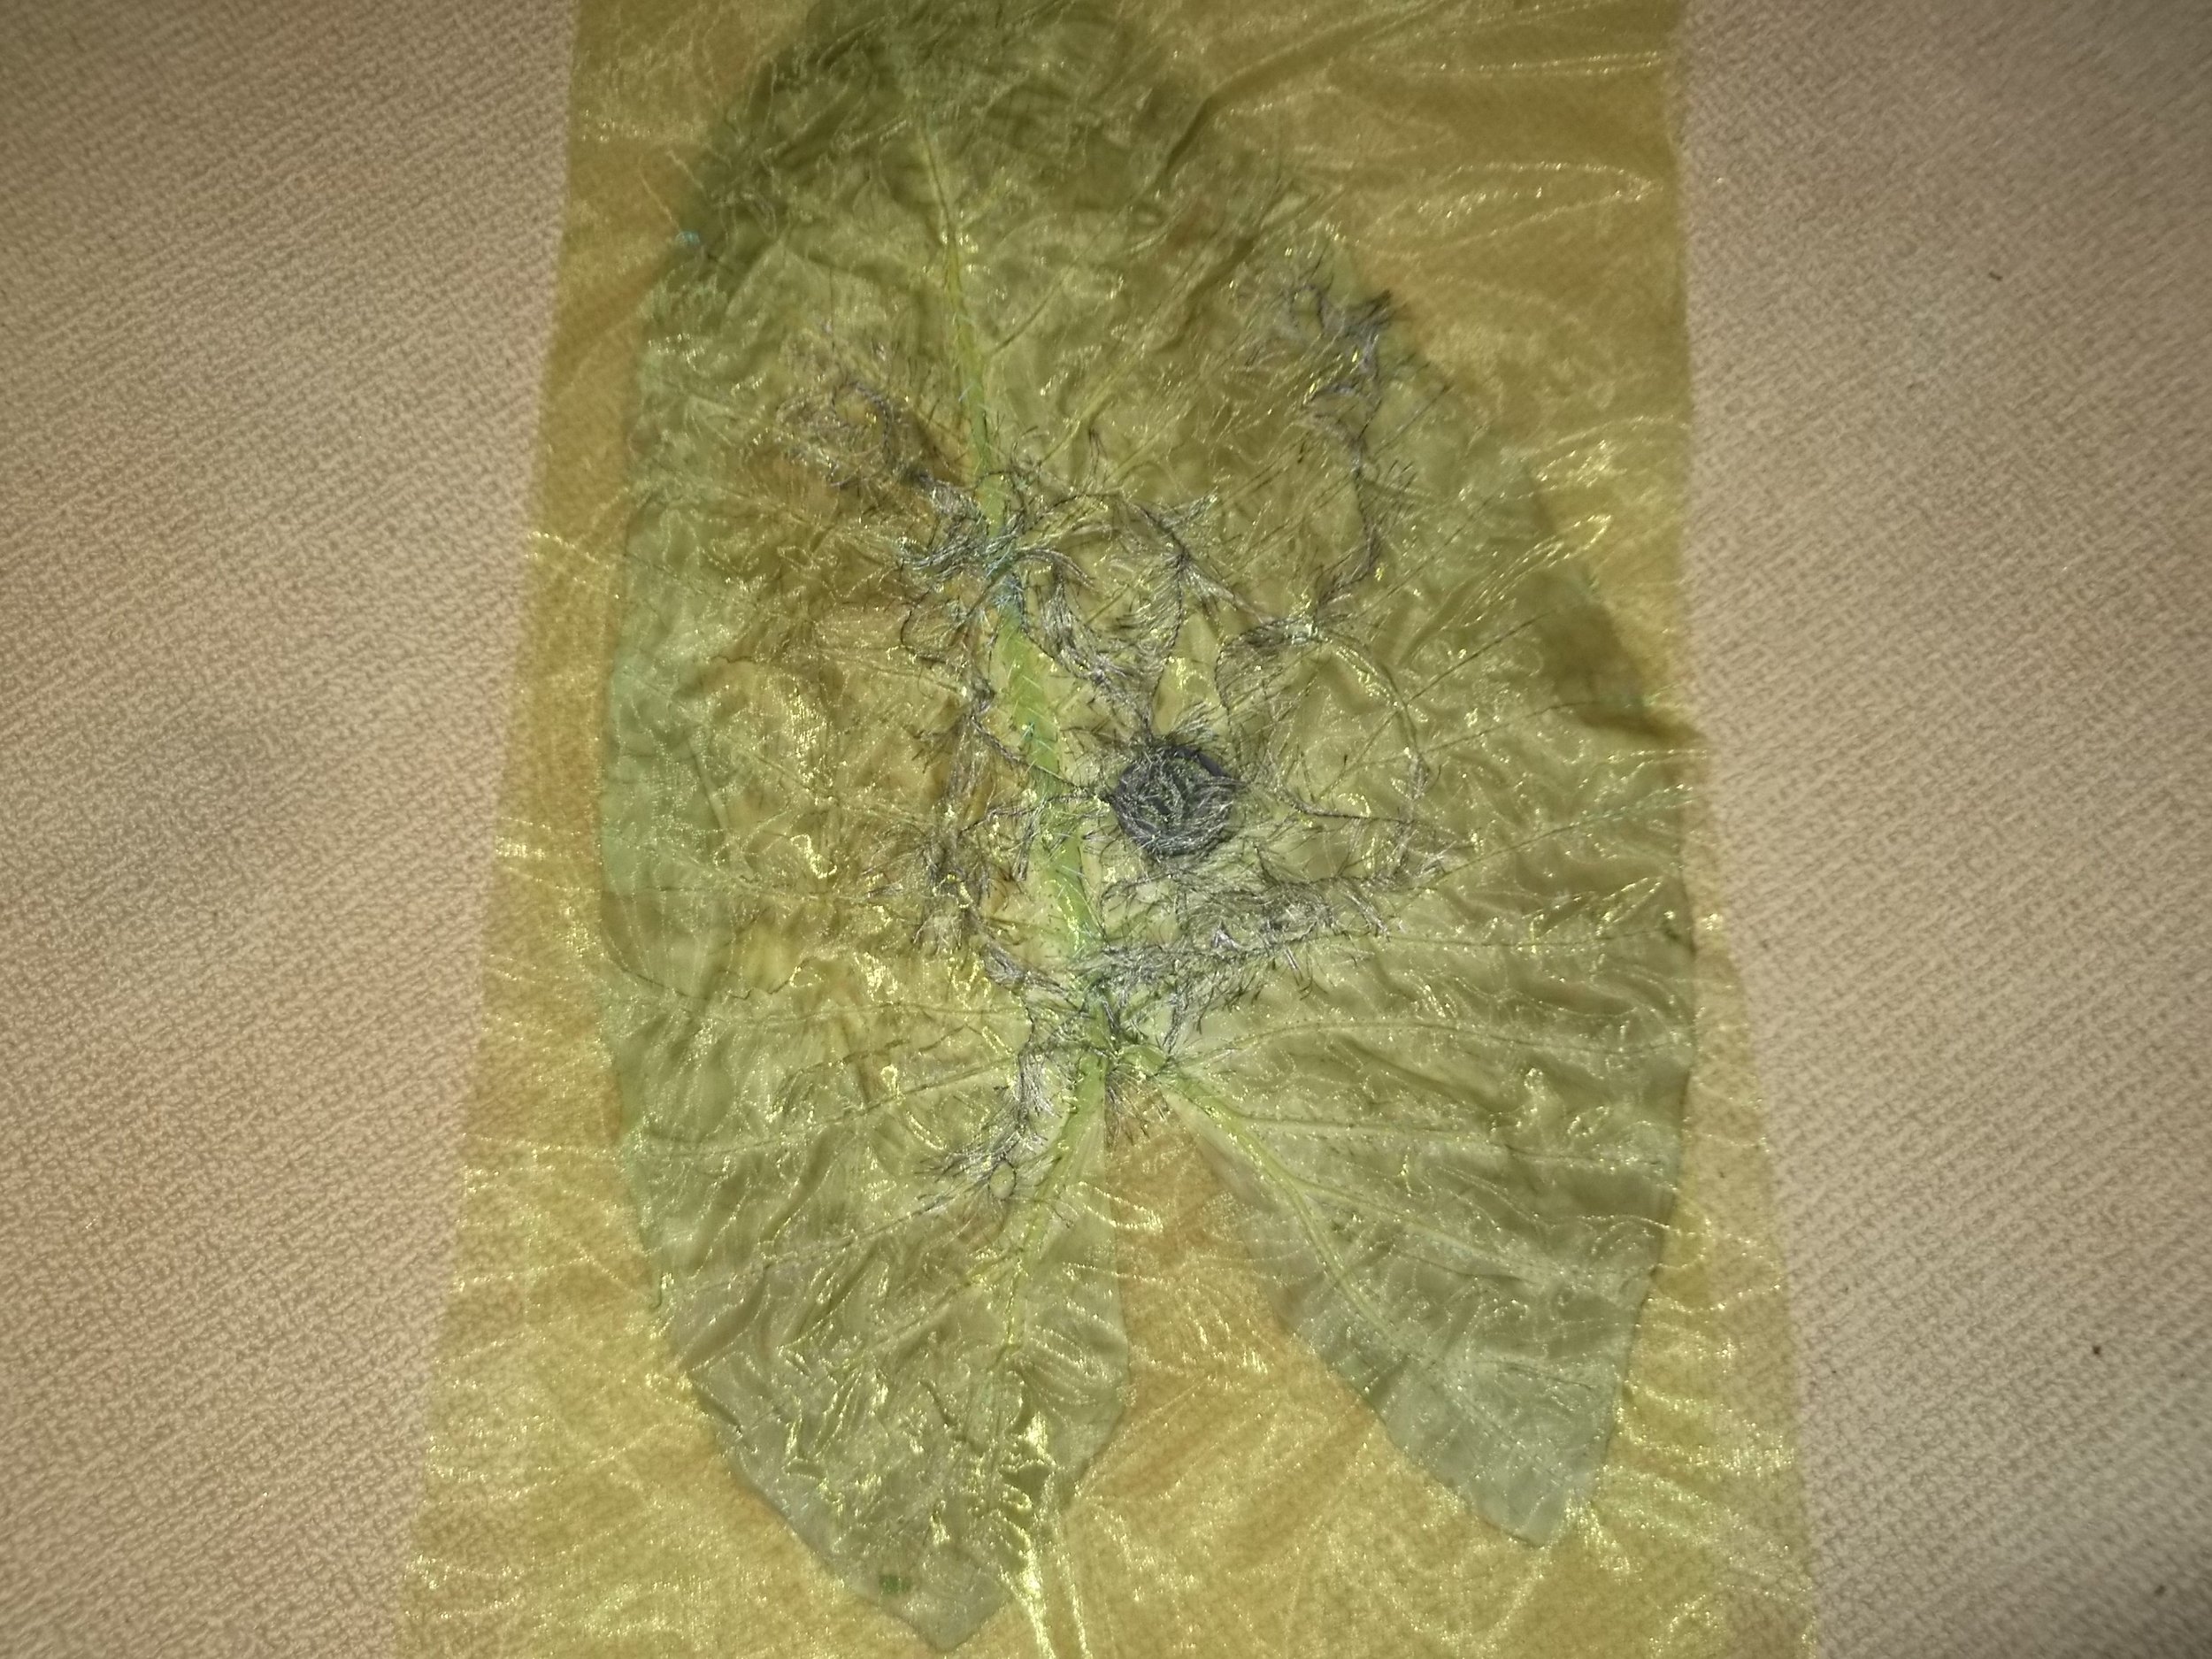

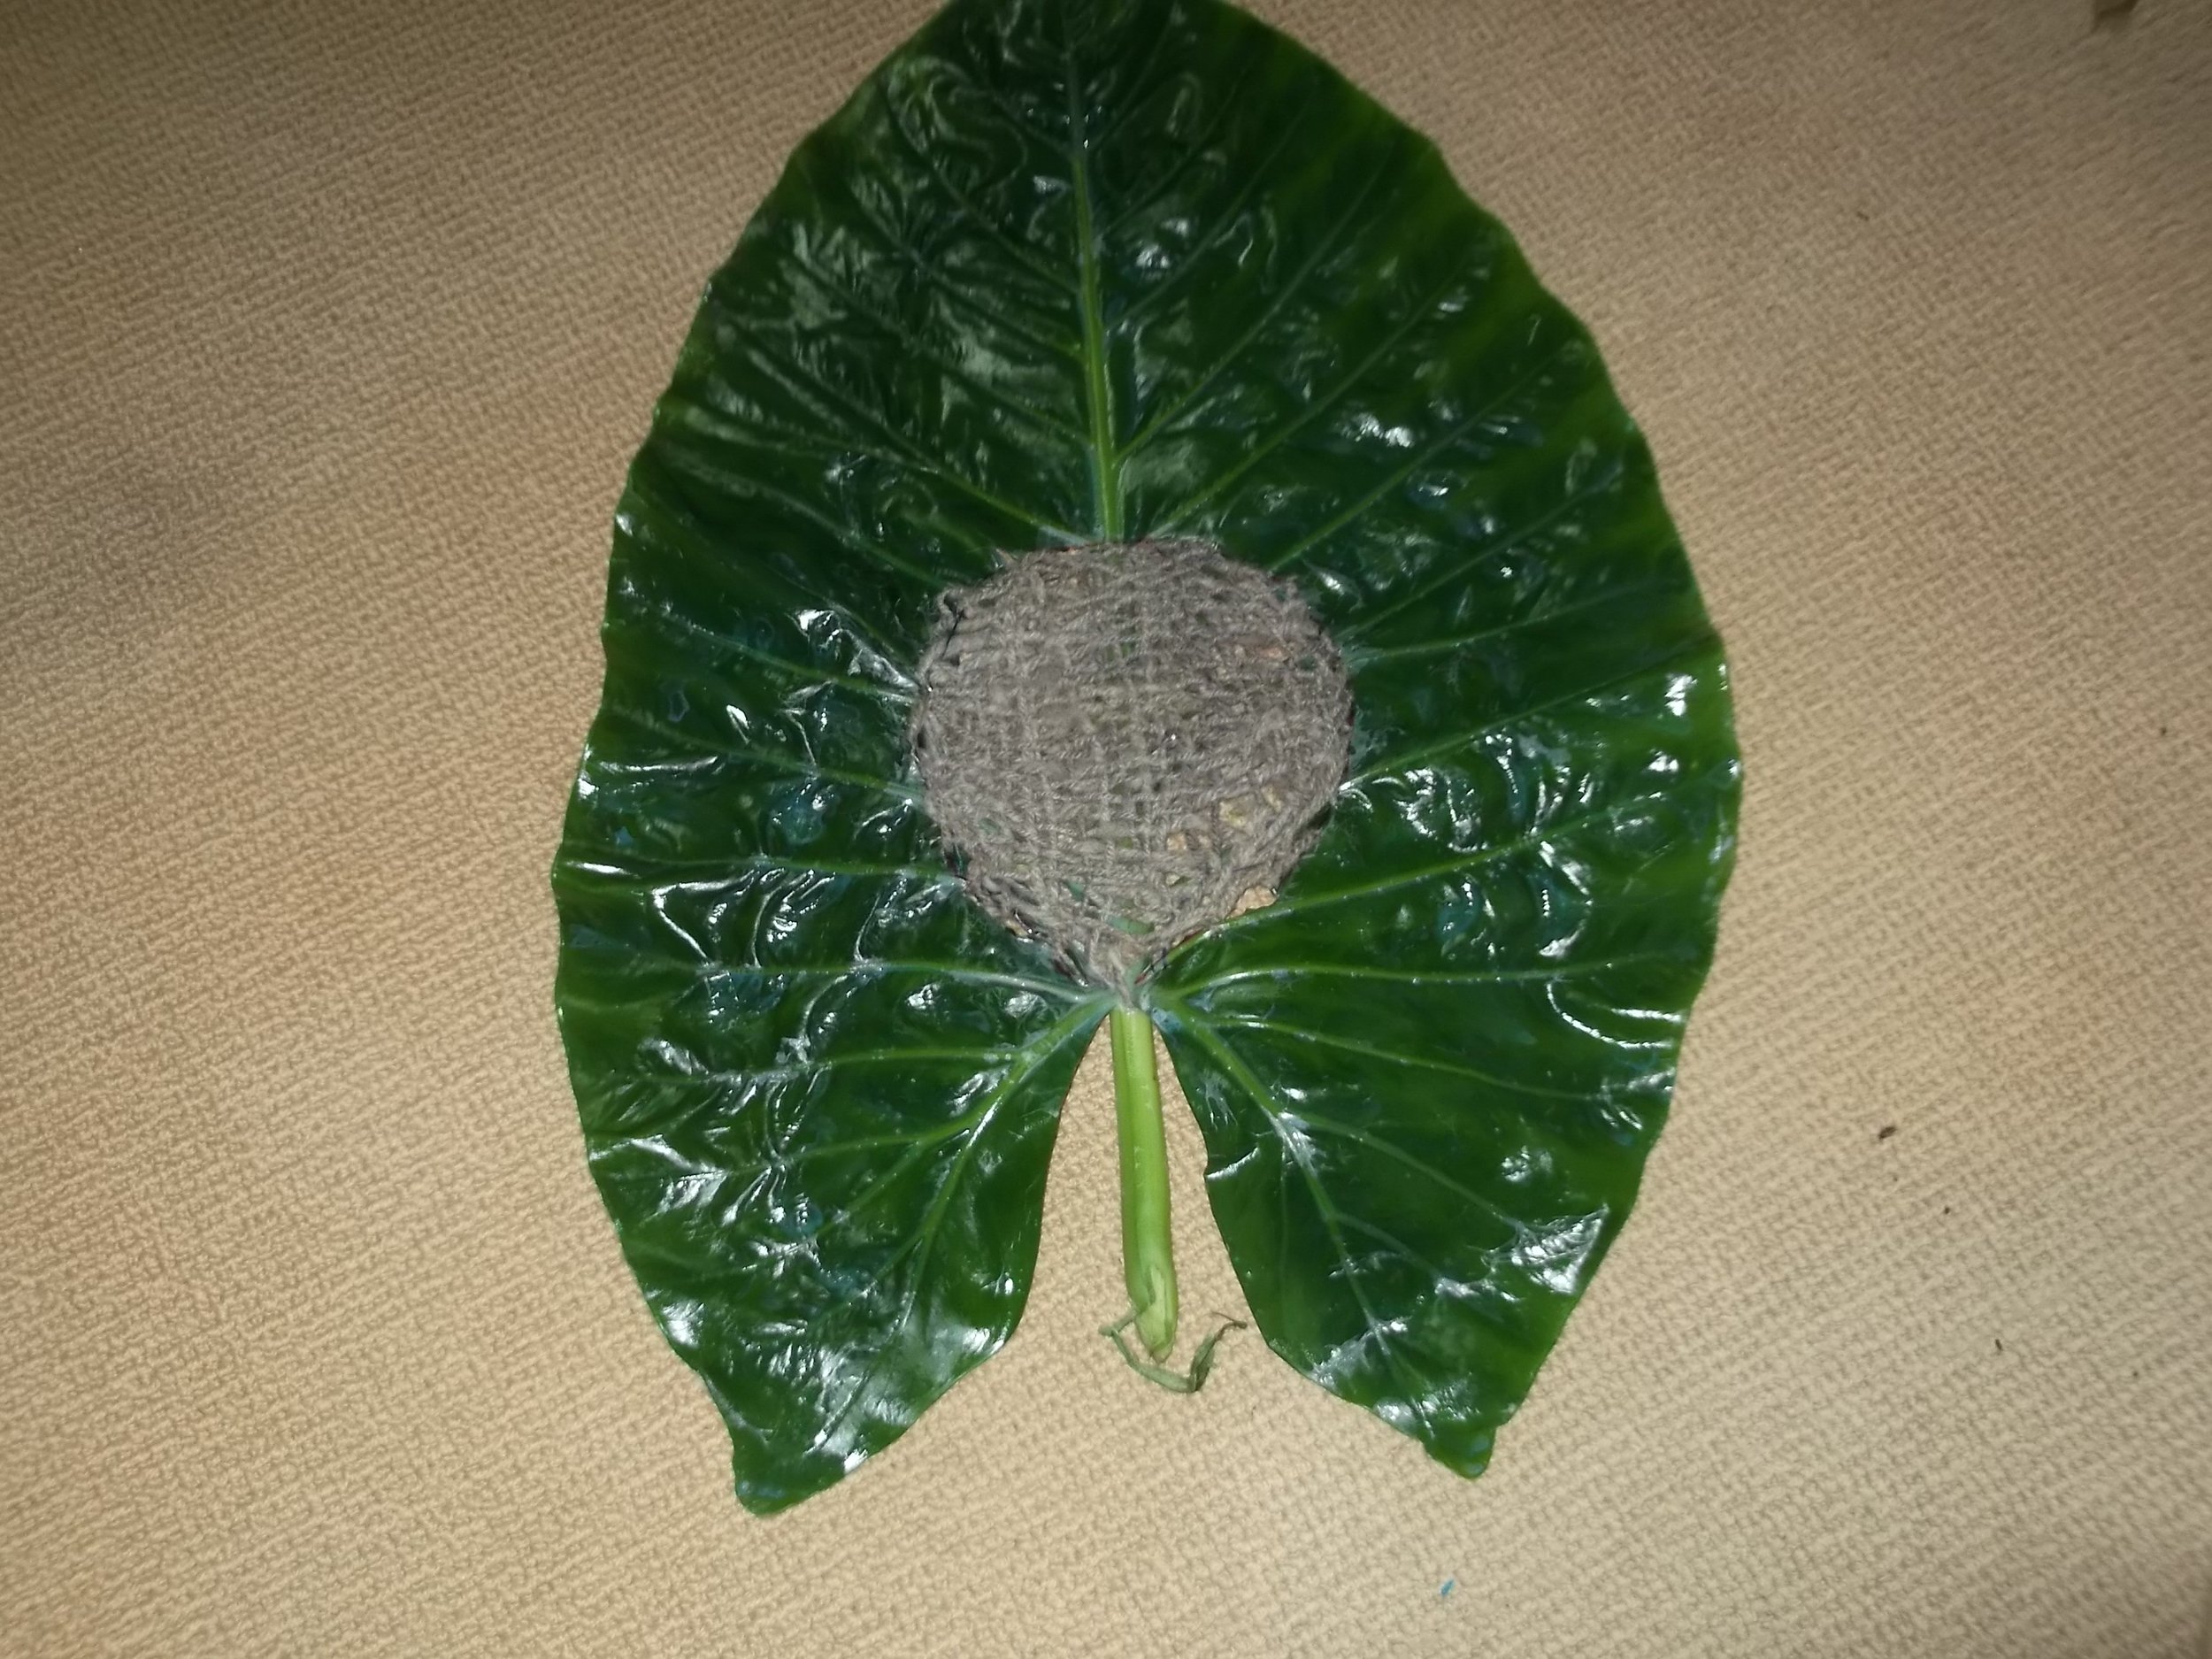

The small pictures above show the old leaf in process, the young leaf painted with gel and with its woven centre. The final two photos show the young leaf embellishments close up.
So this piece of art became not only a finished art work but a special talisman. It is five years old now and still has a power to move me when I take it out

More Stitching On Leaves
A Large Plane leaf with Hydrangea flowers and embroidery embellishment
In the park next to my house there are lots of Plane trees which have large leaves and I often use these as inspiration for art work. In the Autumn they litter the ground in great masses and are fun to crunch through when I take my dog of a walk.
The plane leaves are quite brittle when dry so I would have stitched this when it was green ( or maybe I soaked it in some water to increase flexibility before I started). If you do this make sure you pat the leaf dry with paper towel before you start. as I have not use organza or net as a supporting basis. I have stitched directly onto black felt using blanket stitch in an appropriate colour.
I have added two hydrangea flowers which were pre-made using the organza sandwich method and then applied to the base of the leaf using very small blanket stitches. In the middle I have embroidered the word Resilience. In hind sight maybe I should have used a more contrasting thread but I did not want the text to overpower the leaf.
Amanda Bauer is an artist who does some amazing work with stitched natural materials. If you are interested you might like to look up her work.

Using stronger Leaves
Magnolia leaf with crotched edge and inner insert
Stronger (thicker) leaves can be stitched directly onto or if you are concerned about tearing you could place net on the underside to support your stitched. I have used both methods. The example above does not have support. If using net support carefully trim it off after the stitching is complete so that you do not see it on the front side.
I first blanket stitched around the magnolia leaf and then used double crotchet to extend the crotchet edge. The inner centre is done in a similar manner. First cutting out the insert with a craft knife and then blanket stitching around the cut out section to reinforce the edge. Then I simply interweaved the threads horizontally across the blanket stitches. These magnolia leaves do tend to fade as they dry out but I quite like that effect.
In this example I have used a thicker crotchet thread but I have also done ones with fine crotchet thread as well. Both look fine and give a different appearance.
The end results will be more brittle as the leaves dry so either frame your work or mount on felt. Felt with a window portal effect of a contrasting fabric looks well also.
This is a mindful activity that is fun to do in front of the TV at night,

Abstract From Scraps
I always find abstracts difficult to get correct so this was a way of creating an abstract composition to utilise some of my pretty scraps and reused garments. I started with a piece of paper and crumpled it up. When I smoothed it out I could trace along the lines of the folds and use as a pattern to insert the fabric pieces.
I have used some pieces of shiny packaging material with free machine stitching, some velvets and some satin and cottons. A few shapes I embroidered into. I worked it on a base of cotton sheeting over pellon

A Light Box with Stitched Leaves
This example of using scraps and stitched leaves has been created by sandwiching textured scraps of yarn and stitched maple leaves in a circle of silk organza. Polyester organza could also be used but silk organza has a more mat finish which I prefer when mounted in a window for the light to shine through. Once the basic pieces had been assembled, I used a metal hoop, cut the organza in a circle slightly larger than the hoop and then folded the edges over the hoop and stitched it in place. I have finished around the edges by binding on pine needles and embellishing with some beads

Stitching on Leaves
Circular Stitched Leaf construct
Leaves are more robust than you may think, especially those that are of thicker construction. If you sandwich them between two layers of net/organza and stitch through the three layers you can create some magical results. The colours stay pretty much to the original colours - much like pressed leaves.
You can see in the example above the softer (Japanese anemone) leaves have shattered slightly in stitching but the organza still holds the shape of them together. I think the leaves may have dried out a bit before I stitched them. Using fresh leaves or hydrating them in water and patting dry with a paper towel before starting helps to prevent this. This round has been made for several years now and is still quite vibrant.
Leaves used in this construct are from the outside: Japanese anemone (green) flowering cherry (Autumn with burgundy organza - red) Autumn gingko (yellow) small leafed maple (red) and a blue/grey hydrangea flower in the centre. Once the leaves had been made and I had decided on the arrangement I just hot glue gunned them to a round form.
I often stitch leaves in the sandwich form during the Autumn months and store them in an airtight container for later art work. I have incorporated them quite a bit in various places - eg. Going Green Denpasar in the teabag section. Stitching the leaves is a very relaxing and in the moment activity. I usually stich along the vein lines by hand with a simple running stitch and then outline stitch the leaves on the sewing machine. To avoid having to stop and start I often stitch along the perimeter of the leaf to the next vein. You could hand stitch the outside edges as well. I have done this and it worked OK. The machine edge is more regular and closer together which is why that is my preference. I have tried burning off the organza around the edges of the leaves with a soldering iron (rather than cutting them out) but I didn’t like the effect of the burnt edges but. That is also a possibility for a different effect.

Working with Bits and Pieces

This is a very early experimental piece where I wanted to explore both recycled materials and avoiding the use of nice straight edges - something I still tend to struggle with. The substrate is strips of old jeans woven together and free machine stitched in a pebble design. The diamonds at the top are cheese wrappers and textured yarn sandwiched between layers of organza and free machined in a random stitch. The black and red circles are two buttons that have been stitched with red embroidery floss to create the windmill look. I have used part of a satin table napkin on the left hand side with couched korus. Over the bottom of this I have applied a small crocheted doily with the print of an old farm house. This print is on foil - another experiment at the time. The top is suspended through a branch to provide a hanging sleeve.
We all need to push our boundaries from time to time and this piece became a jumping off project for many later recycled pieces. There is a circular emphasis contrasted against the squares of the weave, the cheese wrappers on point, the foil print and the side napkin.

Reusing Vintage Linens
Charlotte on a vintage tray cloth
I collected quite a few vintage embroidered linens from charity shops over the years. My problem is that when I come to cut into them to give them new life, I think of the hours of laborious work that some unknown person has put into making them. I find it incredibly difficult to cut them up. This piece was a bit different because i was adding to the hand embroidery on the tray cloth.
I took a photo of my granddaughter, Charlotte, and traced the main outlines onto tissue paper. I pinned the tissue paper on the area of the tray cloth where I wanted to add my extra work and then I simply embroidered through the tissue to create the outline of Charlotte in black. I have used a simple back stitch to do this. I appliqued the apron in a bright fabric.
To remove the tissue paper without “pulling the stitches, use the index finger on your non dominant hand and place it over the stitches where you want to start. Gently pull against the pressure of your finger with your other hand and the tissue paper will tear away quite easily.
I added the light blue buttons at the end just to finish this off.

So What is A Reliquary?
The completed reliquary
A reliquary is an ornamental vessel from the middle ages that often housed relics such as fragments of Christ’s cross. They were often elaborately decorated. I decided to make a reliquary when I became fascinated by this history in my study of Celtic customs. This has formed part of my Parallels in Maori and Celtic culture and houses trinkets of Maori and Celtic symbols.
As usual I decided to make each side from recycled materials. This one is a pentagon shape (5 sided) and each side was completed separately before being joined up the sides with additional embellishment of small beads in the seams. I used a wind cask to create each form of the pentagon. The top triangular parts were folded in and seagrass was attached at the apex. The seagrass was then threaded through the inner of a used up cello tape roll. The ends of the seagrass closings were fixed by threading them through holes in shells picked up on my beloved Mokau beach. This also gave the sea grass a weighted end as well as acting as an added embellishment. To give a more ethnic appeal I have used cockerel feathers on the top (fold in) sections. These ones gleam in metallic colours when the light strikes them. Below you can see each of the sides before final assembly

The five sides before assembly
The left hand side is foil sweet papers with textured yarn (free machine stitched over black net). The second section is an old scarf that had ripped. I added beads in the decorative holes. The middle section is an acrylic substrate painted with acrylic and couched copper wiring detail. Next is a camembert cheese wrapper with textured yarn and black net free machine stitched. The final panel is stitched copper foil left over from another project.
Waste products can look quite different when subjected to processes to create a textured surface.

An Almanac From Lockdown
October Lockdown - one square a day
Like many people, I set myself little challenges during lockdown to keep my creativity alive. This piece was October 2019. I worked at creating one square a day. The squares are mounted on felt. The pink is coffee foil packets with decorative threads and burgundy organza, free machine quilted. In the centre of each square I button holed a black circle of felt and then offset a used teabag in the centre of the felt. The centres were all embellished differently with things from my stash
There are 31 squares and these have been mounted in 4 columns (weeks in a month) by 7 rows (days in a week) The remaining days were attached at the bottom. This is the first time I had used strings of beads to join things and I found that quite difficult to keep things in alignment and to finish off the threads so the beads did not come undone. The end squares have small lavender tassels to complete the piece

Pockets from old Jeans
Denim Pockets Made from Old Jeans
There are lots of ideas for using old jeans but this was an idea from an old Stitch Club workshop from UK based artist Debbie Lyddon. I cut out the shapes from denim and then the two on each side were stencilled with an ammonite stencil in gold acrylic. Part of this exercise was to create a holding object for special items and to create holes so that the items peaked through from the inside.
The holes were made using a variety of metal rings that I buttonhole stitched around to create the windows. I added small bead embellishments to my trio.. Once the decoration was done I seamed two pieces together to make a pocket and finished the top edge with button hole stitch. finally I mounted the three pockets on mount board to display them and the contents that peak out through the windows.
Hidden inside are some pretty rocks that my grandchildren brought back from a south Island holiday. The stones are pretty but they also hold the memories of that holiday the kids had. They may have forgotten but i still remember their excited stories as they told me about where they found them

Freeform Pineneedle Weaving
Freeform pine needle wall hanging
This was even more fun. No form to follow. I used the same technique and just ad libed the shape and form as I went.. I placed a metal tree of life icon in the centre

I just added this photo to show how the needles are held together by threading them through a straw as you weave. More pine needles are added at the end of the straw at various intervals so that a continuous thickness is achieved.
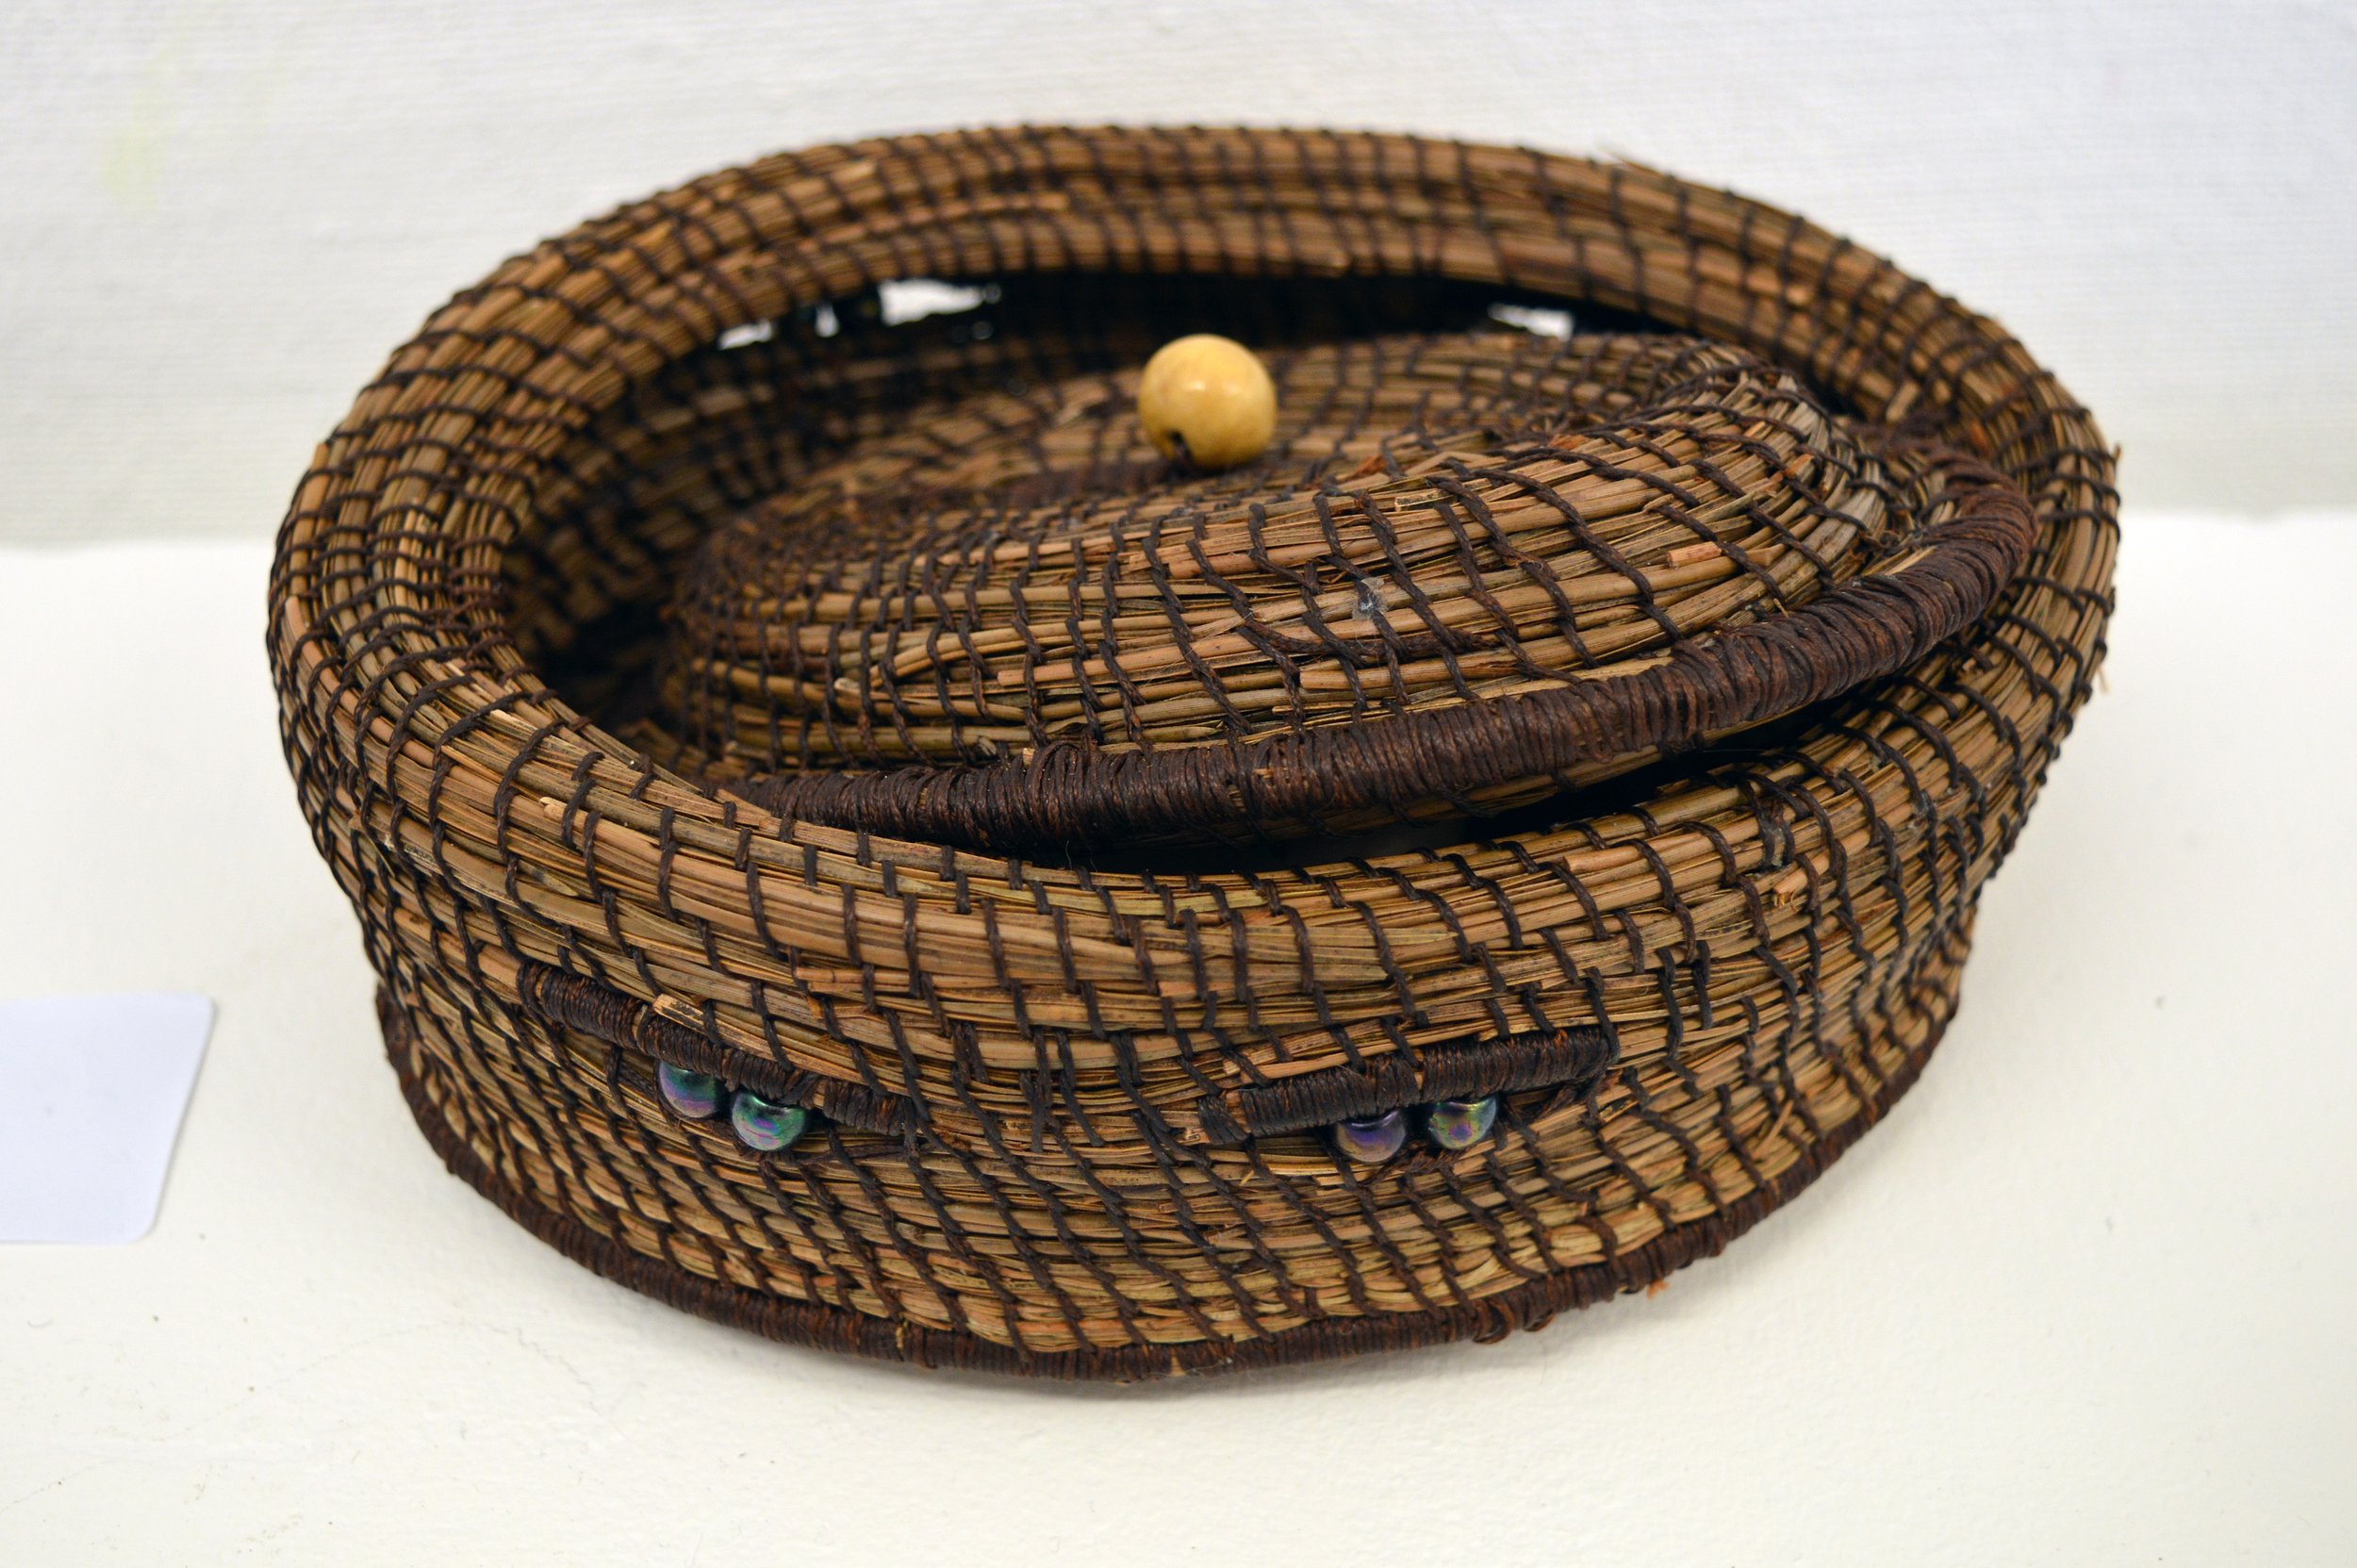
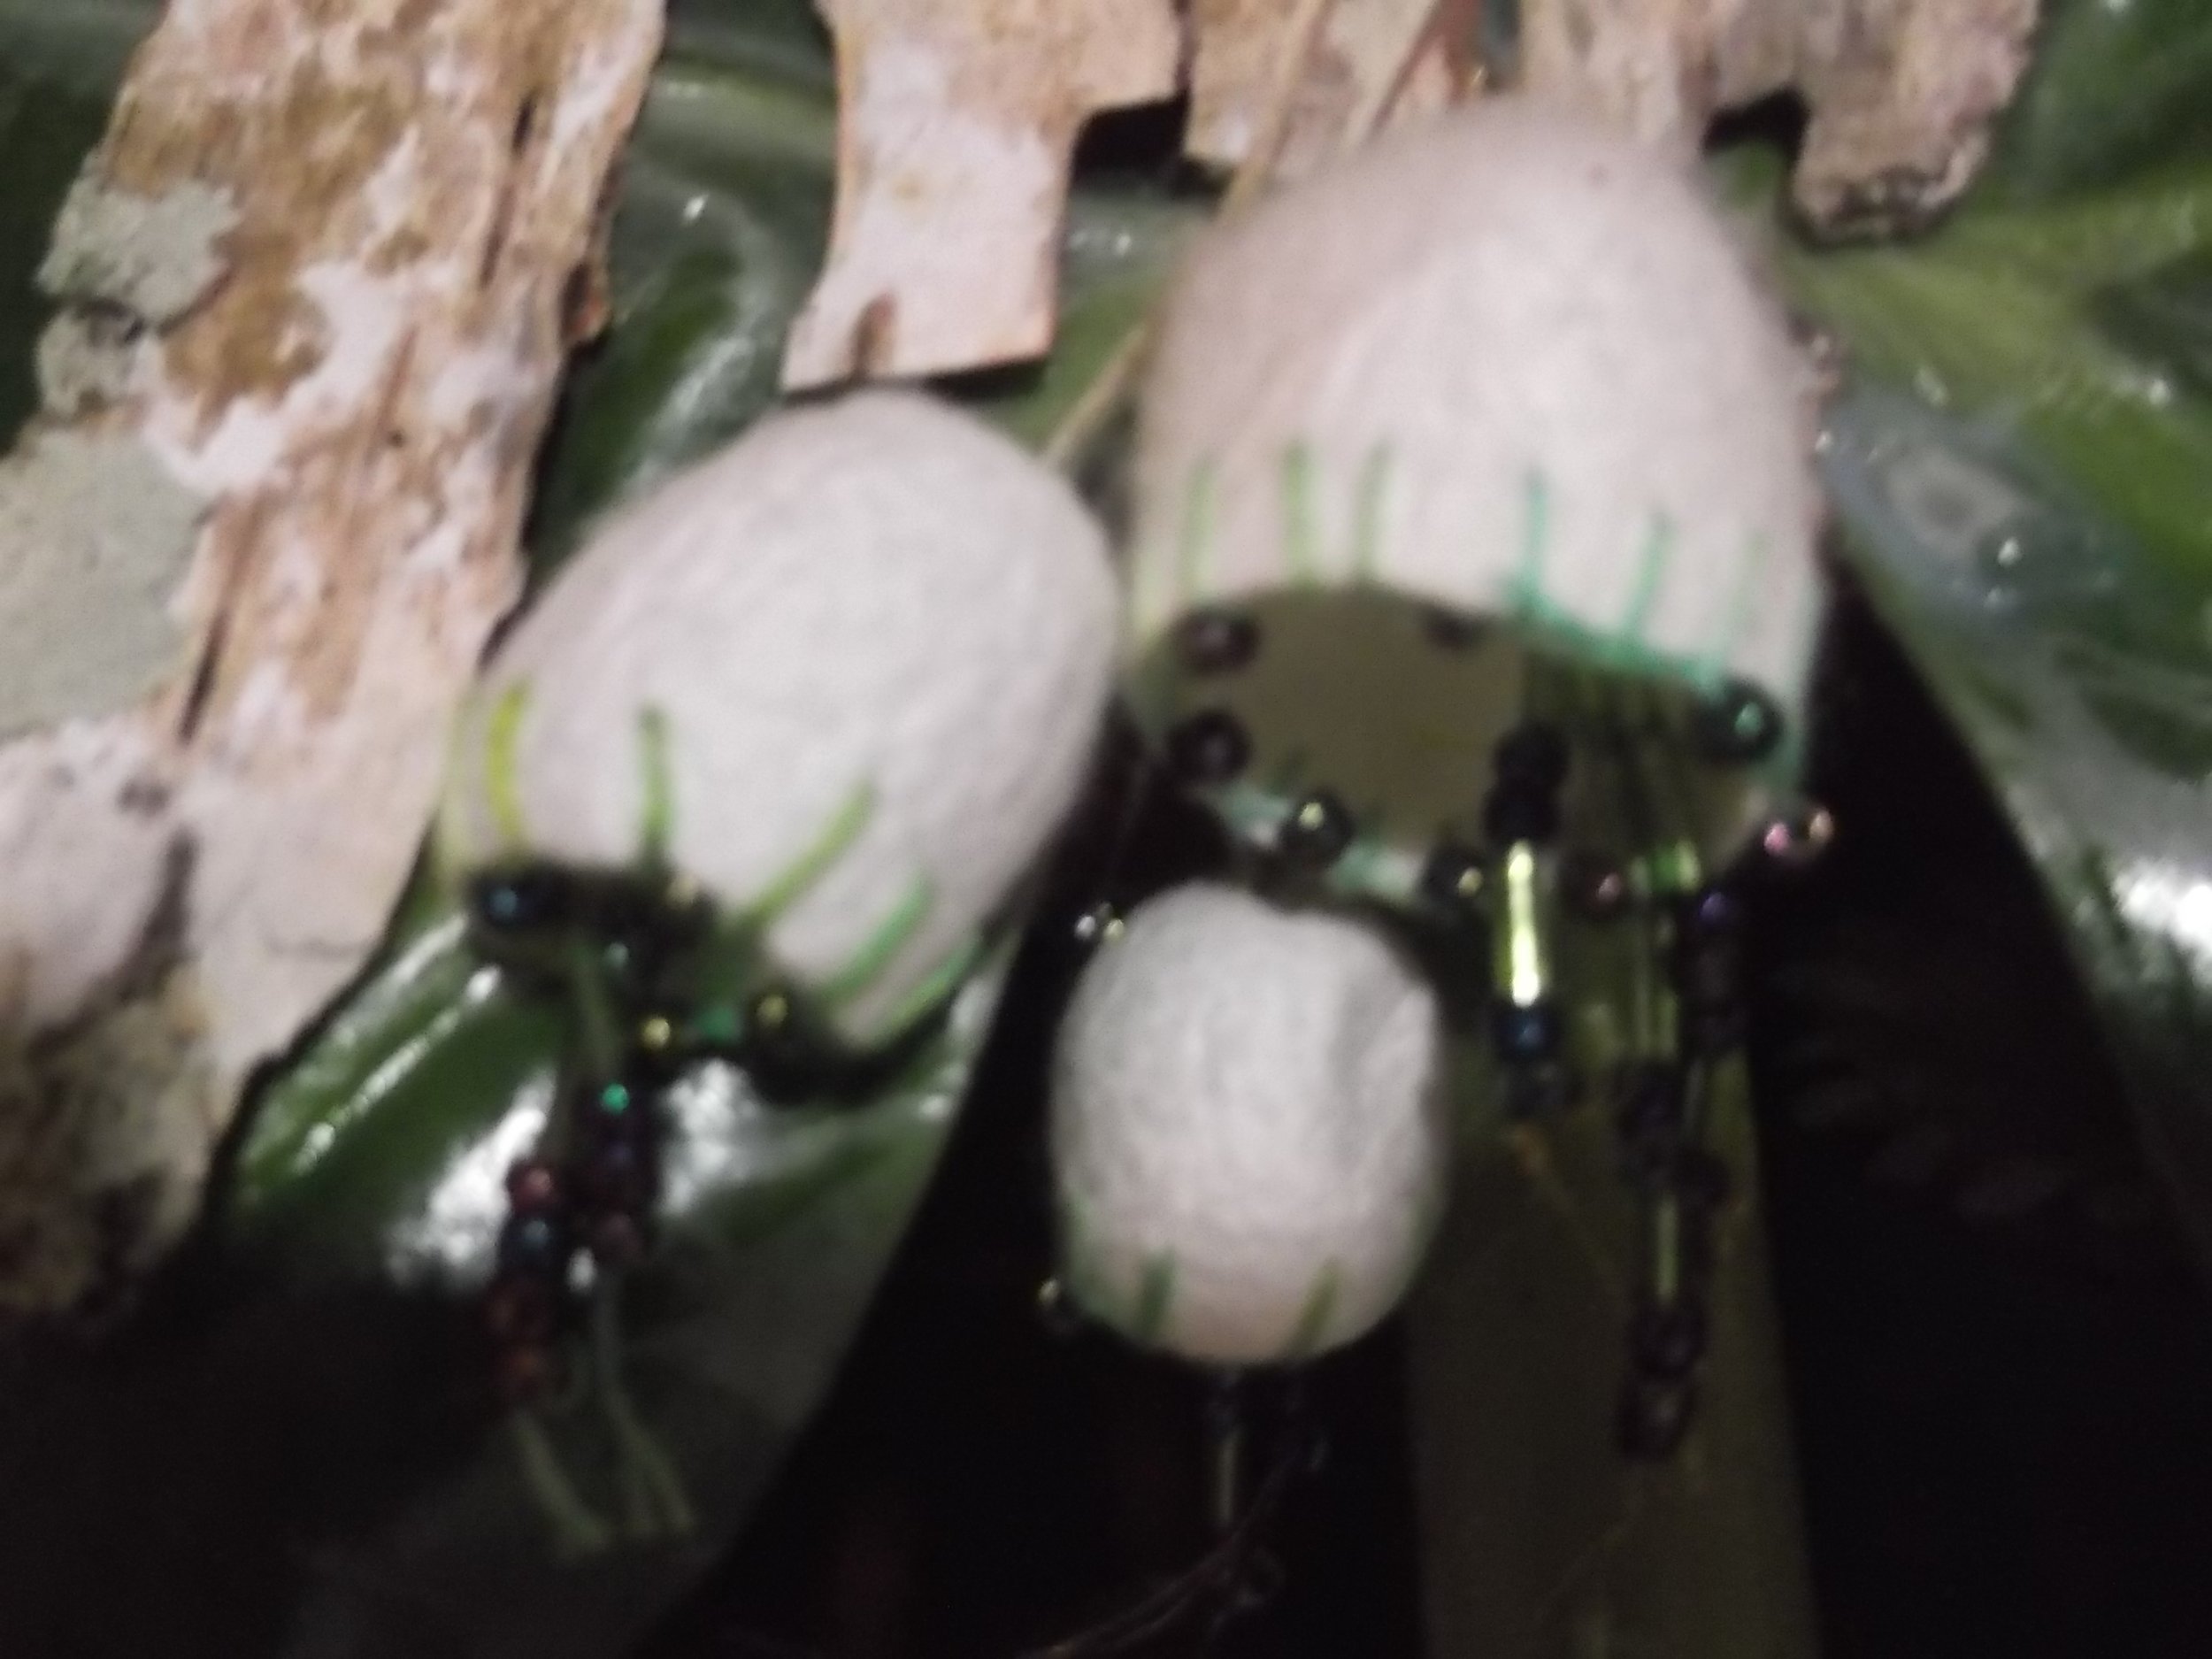
A Pine Needle basket
I am not a weaver but i inherited a small needlework basket from my maternal grandmother and was fascinated by how it had been made. My whole reason for working with pine needles was based on this concept.. More advanced proponents of this technique will have lovely straight lines in the binding but i was happy with what i achieved. It is a slow meditative process and at some stage I want to revisit this technique.
The pine needles are threaded through a plastic straw and each layer is bound to the one before with waxed thread. Where the beaded inserts are I just wrapped the thread around the pine needles to create a window and then carried on with the weaving technique. The beads were added in later using thread to attach them inside the windows.
The edge of the lid was made in a similare way: binding the pine needles and catching them in periodically to the layer below.
I think my Nan would be very pleased to know I had carried on this tradition from her inspiration.

Working with Pine Needles
Pine needles are readily available and a renewable resource. However, not all pine needles are created equal. In New Zealand there are lots of pinus radiata trees but these needles are quite short for creating art woven projects. I am fortunate that the park next to my house has a Ponderosa pine and these needles are excellent as they are quite long and strong.
Pine needles gathered off the ground need to be washed and dried to make sure no bugs or spores are attached to them. This is a simple as washing in warm soapy water and patting dry with a towel and leaving to air dry thoroughly.
To control the bundle of pine needles and facilitate adding in of more pine needles, the needles are threaded through a plastic straw and then attached with strong thread. I have used a polyester waxed thread. The ultimate in waxed linen thread but this can be expensive and difficult to source.
In the project above I have used gel medium to attach tissue to a firm substrate and achieve a textured background. Once dry, I have placed some blobs of acrylic paint in random places on the substrate and used an old credit card to blend and spread the paint.
This was an introductory example of using pine needles so the composition of the pine needles is just three simple korus at varying heights. We will look more closely at more comples projects over the next couple of days